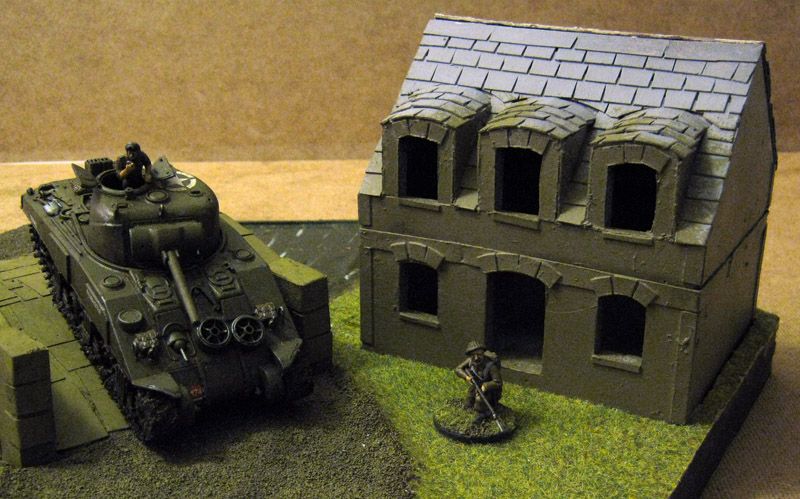
While the new moulds for the French howitzer slowly set in the pressure chamber (the first mould was an abysmal failure) I have returned to building buildings.
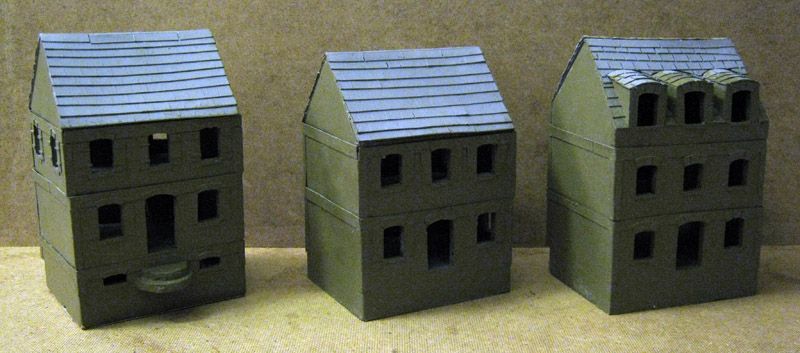
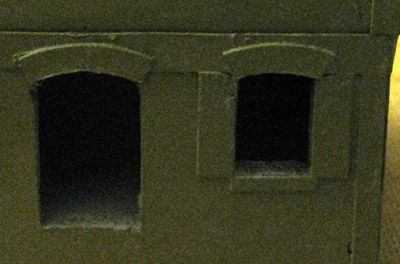
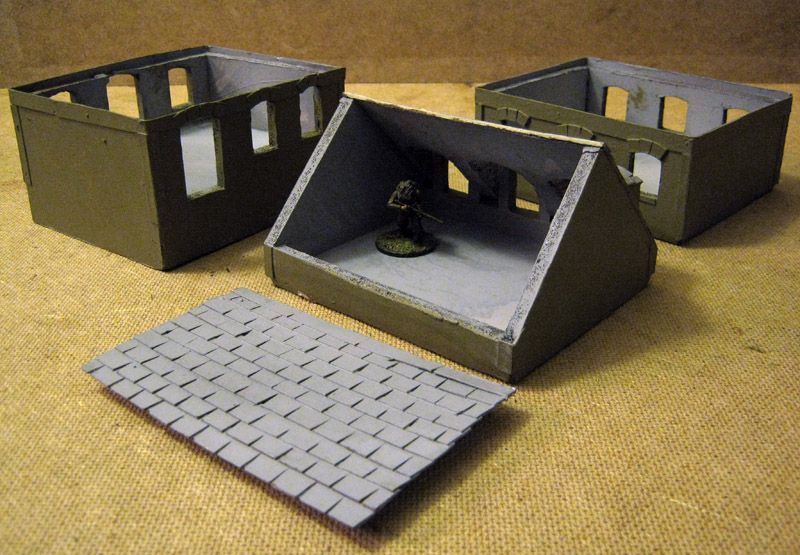
First up are a pair of ruins to change up a street of houses, or to replace buildings when my artillery finally manage to hit something.
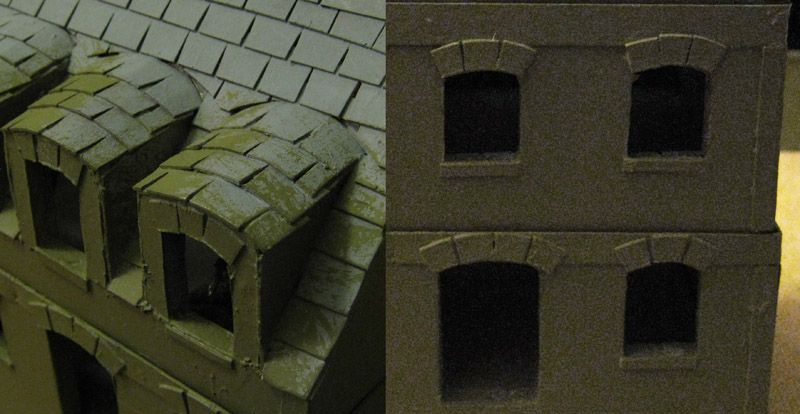
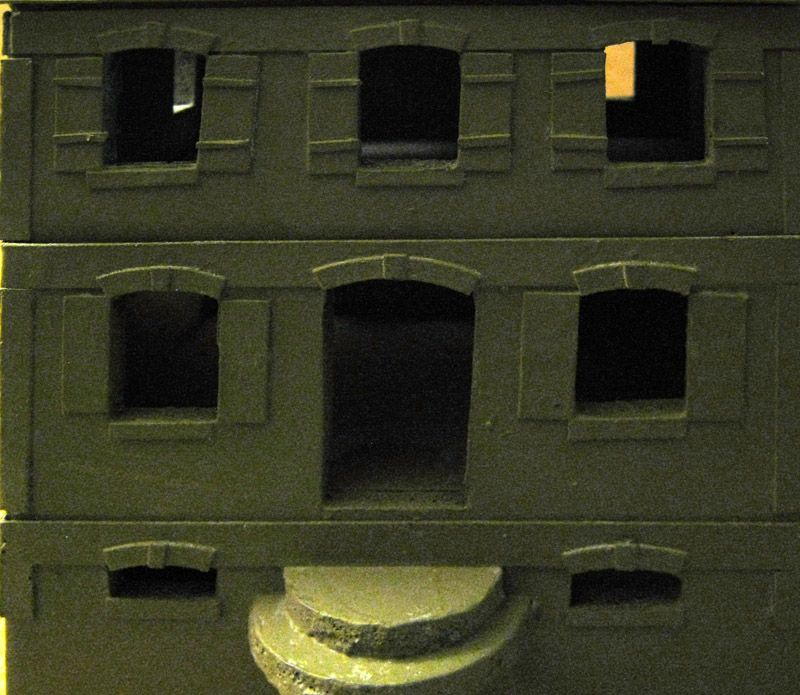
I have used these to change up and perfect my detailing. All the windows have lintels and proper shutters, the corners of the building now have brick work rather than the rather plain straight edges.
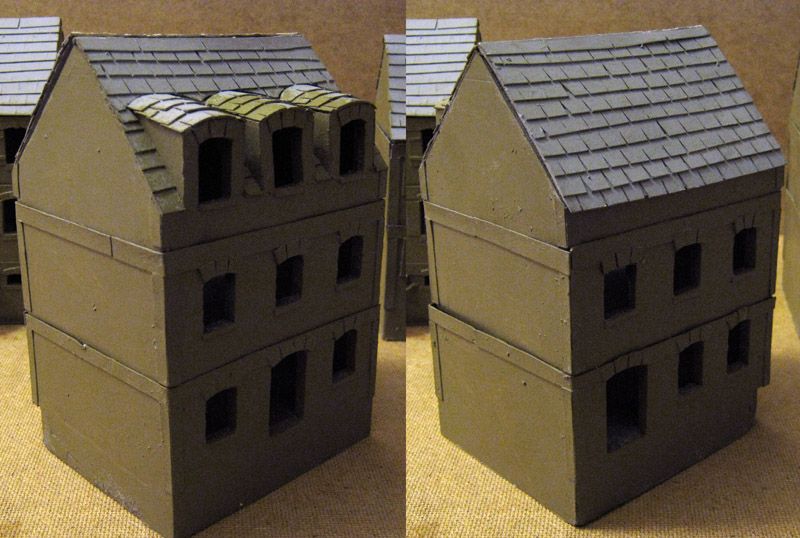
Next up is a corner building for a road junction that features on one of my hexes. This was a bit of an experiment, and not one that I would repeat in a hurry.
See all the brickwork, each brick was placed individually, it is a good thing I am already touched in the head. Not something I can see myself repeating unless I was planning to cast it up.
Lintels, arches and shutters all conform to my new standardisation, but the rest is come as you may. I did try to make another storey to this building, but the angles were off and I had to ditch it. I may give it another go at some point.
The building has an arched walkway which I have no idea how to
deal with in the game, but was copied from buildings in H&D2.
More Buildings on the way soon, and hopefully some successful howitzer
casts.
~ Bob
Thursday, 19 September 2013
Saturday, 14 September 2013
French Medium Howitzer
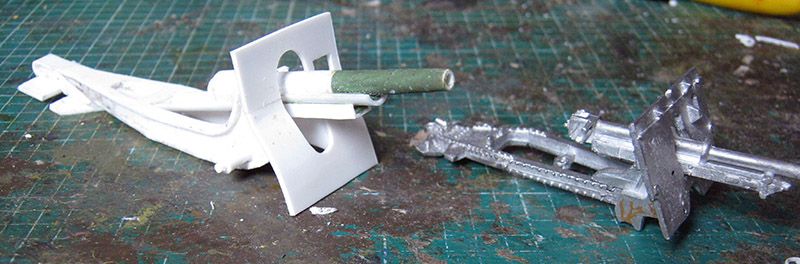
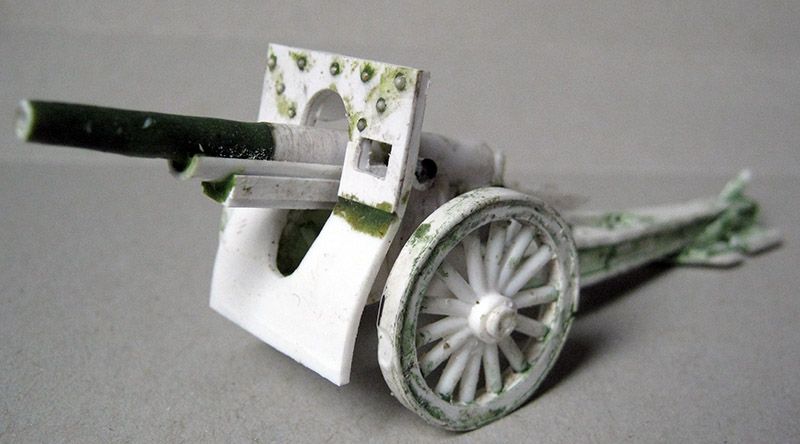
I got somewhat annoyed by my failure to find a medium howitzer for my planned WWII French army for Bolt Action. Despite many hours of searching I could not find any French artillery larger than 75mm. I even hunted for Great War vintage weapons as the French used a lot of antiquated equipment during the Battle for France. So on Thursday night I started to scratch build (Westwind 25pdr for scale).
I based on the design of the Schneider 1913 105mm. Primarily because the box carriage is simpler than split trail and partially because I can use the same carriage for the 1917 155mm heavy howitzer.
I posted the work in progress shots on the WWPD forums and received a deluge of requests to cast and sell it (Four requests in two days counts as a deluge in my mind). With this in mind I put in a bit more work into the model than I would have done for my own temporary proxy model. This was the result just before it entered the pressure pot for the start of casting.
It wasn't until I received the 'Armies of France and the other allies' earlier today that I realised what luck I had in choosing this subject to scratch up. The French did not manufacture this gun only for domestic military use, but also exported it to Poland, Belgium, Greece and Italy.
I'll see how it casts up some time next week.
~ Bob
Thursday, 12 September 2013
Buildings workshop (Part 1)
These buildings came after some trial and error in adding buildings to my Hexboard Project, which has attracted some local interest, but I have yet to refine to a point where I would be willing to put it on the market.
Building 1
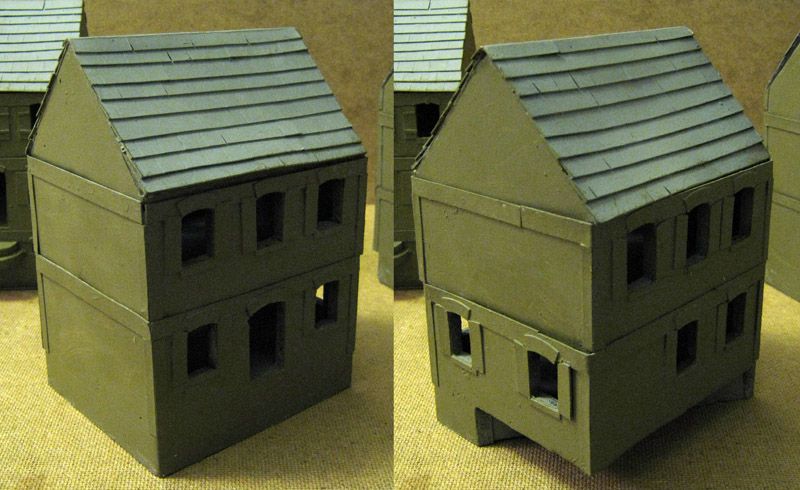
A fairly simple two storey house. Parts of the dimensions (particularly the window sizes) come from Matakishi's designs. I actually built a few houses according to his templates, but I found them ridiculously small and they have now found there way into a bits box.
The finishing details change between each of the houses in this set, mostly because I couldn't settle on a good way of doing them that was time efficient.
Building 2
Superficially the same as building one, but with rooms in the attic.
All of the buildings split into their individual floors so that models can be placed inside rather than having the models placed off board (and the confusion that often results).
This building has 'stone' arches and no shutters, personally I find this my least favourite detailing. The roof tiles on the dormers also annoys me.
Building 3
The detailing on this is a real muddle. I decided the basement windows were too small for shutters, but the ground floor has standard shutters and the 1st floor has shutters with extra detail. All arches have a keystone. I find this the best detailing, but it also takes the most time
In-Hex pictures
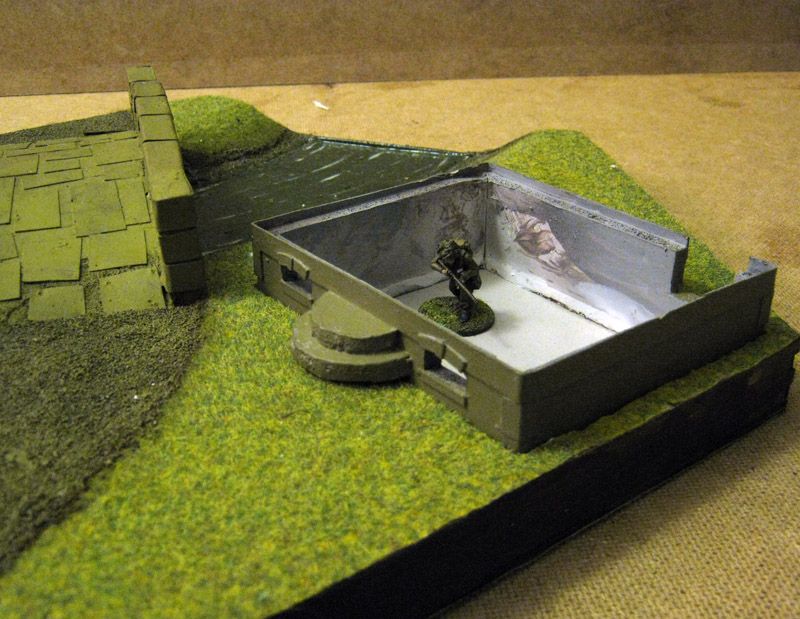
You may have been wondering why the ground level of each of my houses was two cm above the bottom of the building. Well my game board hexes have precut slots for the buildings, demonstrated here with the basement of Building 3:
The next floor then slots on top:
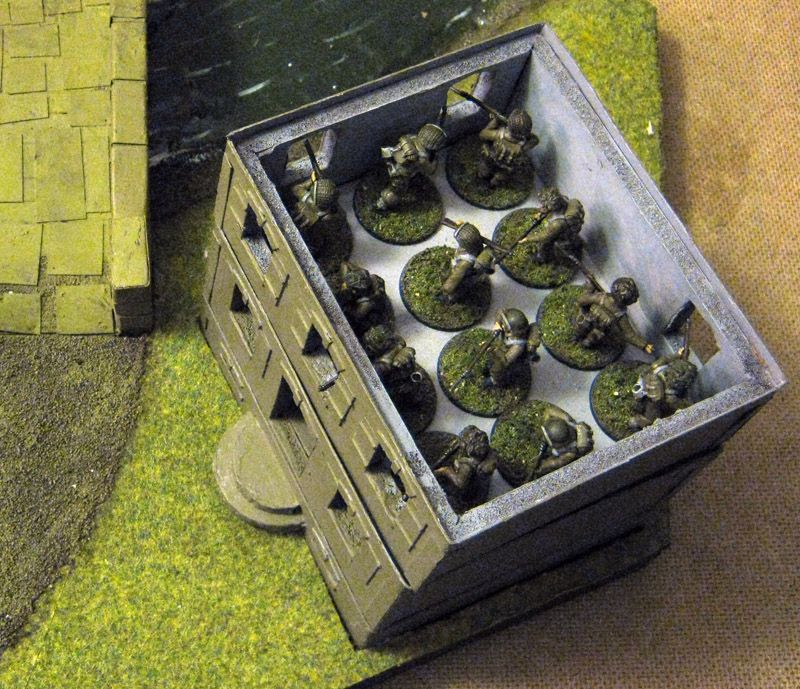
Each floor can fit 12 models on 25mm bases without any overlap, admittedly I didn't design the buildings with Japanese players in mind:
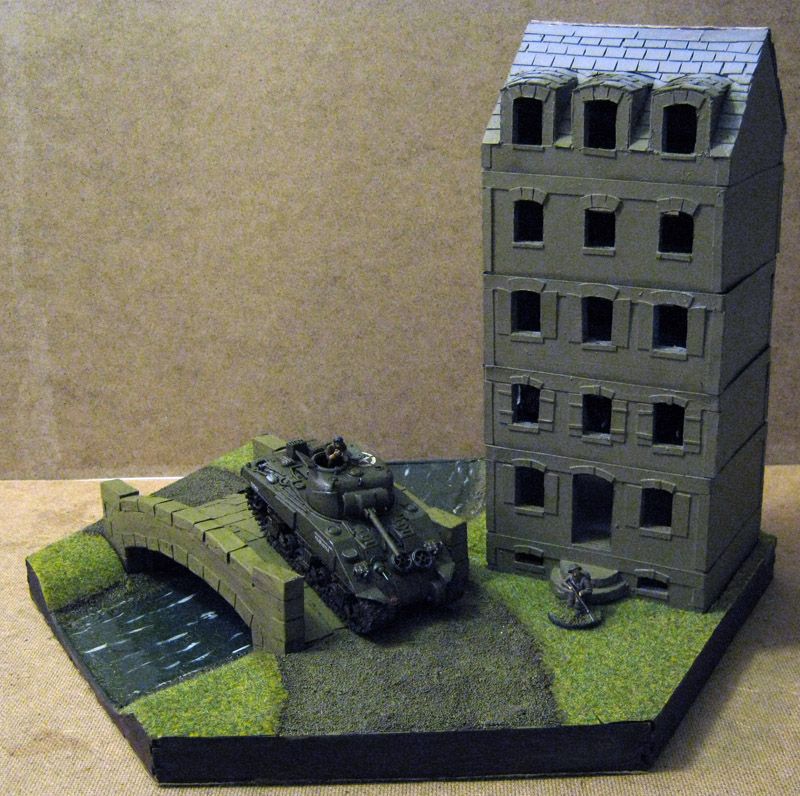
The Buildings are all to the same floor plan, so I can stack as many floors as I like in a single Hotel:
And use the leftovers to make some Bungalows:
Please leave me some feedback, especially let me know which detailing worked best.
~ Bob
Friday, 16 August 2013
Late War British
Not much spiel, many pictures
My main opponent gave up waiting for the Perry Brothers Africa Korps (now confirmed for October, excellent timing, go figure). So we switched to late war Normandy, specifically the Battle for Caen so he could feed his Wittmann and 'Panzer'Meyer fixations.
So my Desert Rats have gone into hiding till I can find a good use for them.
Warlord Late War British infantry. Supposedly 25 in a box, I got 30 plus an apology from Warlord because of the absence of water-slide transfers.
Veteran: 5 Infantry, with LMG: 85
Regular: PIAT: 40
Regular: M4 Sherman: 195
The Shermans are both plastic Hobby Boss 1/48, nice and cheap at £10 each. Some bits will change now I have the 'Armies of' book. The whole army took 3 days to paint, I'm a lazy painter.
~Bob
My main opponent gave up waiting for the Perry Brothers Africa Korps (now confirmed for October, excellent timing, go figure). So we switched to late war Normandy, specifically the Battle for Caen so he could feed his Wittmann and 'Panzer'Meyer fixations.
So my Desert Rats have gone into hiding till I can find a good use for them.
Warlord Late War British infantry. Supposedly 25 in a box, I got 30 plus an apology from Warlord because of the absence of water-slide transfers.
The Desert Rats are about the same height as the Warlord models, but far skinnier
First Platoon
Veteran: 1st Lieutenant, Additional man: 103
Veteran: 5 Infantry, NCO and one other soldier with SMG: 71Veteran: 5 Infantry, with LMG: 85
Regular: PIAT: 40
Regular: M4 Sherman: 195
Second Platoon
Veteran: 1st Lieutenant: 90
Regular: Artillery observer: Free
Veteran: 5 Infantry, NCO and one other soldier with SMG: 71
Veteran: 5 Infantry, with LMG: 85
Regular: Light Mortar Team: 35
Regular: M4 Sherman, HMG: 220
Regular: Artillery observer: Free
Veteran: 5 Infantry, NCO and one other soldier with SMG: 71
Veteran: 5 Infantry, with LMG: 85
Regular: Light Mortar Team: 35
Regular: M4 Sherman, HMG: 220
~Bob
Thursday, 18 July 2013
Hanomag variants - a spotters guide
When I first looked at the Flames of War books I was occasionally concerned by the way some of the lists specified the exacly ausf
or model/variant of halftrack the troops should be transported in.
After picking up some of PSC's 251/1 ausf D's I realised that for the
mid war period I was aiming for the vehicles were rather late. So I have
picked up a bunch of earlier versions of the well know hanomag and
resolved to produce a spotters guide for the uninitiated.
The ausf A and ausf B are both converted from Zvezda's ausf A model (the box inaccurately calls it an ausf B), the hideous Zvezda machine guns being replaced with spares from the PSC sets. The ausf C and D are both straight out of the box PSC models. All are depicted in post 1942 style camouflage to make it easier to discern the differences between the models. The two earliest models had been out of production for some time before this camouflage was adopted.
The first variant of the 251. Prototyping for an 3 ton unarmoured halftrack had started in 1934, with the concept of using the same chassis as an armoured carrier added to the requirements a year later. It wasn't until June 1939, only two months before the Invasion of Poland, that they were first issued to units. This variant was only produced in small numbers and was discontinued in 1940.
The second variant of the 251. Little has changed from the first version, only minor evolutionary upgrades resulting from early feedback. The variant began production in 1939, only shortly after the ausf A, and was likewise discontinued in 1940.
1: The ausf B introduced a shield for the machine gunner, replacing the more flexible mounting. Many ausf A vehicles were upgraded to the ausf B's new mounting system.
2: The more important change was the removal of vision slots from the passenger compartments and the repositioning of vehicle tool sets to the mudguards.
The third variant shows the first structural modifications aimed at reducing production costs, and was also the first to see large scale production. It came into service in mid 1940 after the conquest of France, and continued in production until September 1943.
2: The cooling flaps were replaced with vent covers which allowed for better engine cooling
The final variant began leaving factories in 1943 and was the simplest to build and most produced. The total production of all earlier ausf.s combined was a bare 4,650 vehicles, compared to 10,602 ausf D's. While production technically ended with the fall of Germany, the Praga and Tatra factories of Czechoslovakia continued production of the vehicle until 1963. These were designated as the OT-810 and may have be retrofitted by WWII re-enactment groups .
1: A follow from the simplification of the front plate seen in the change between the ausf B and ausf C. The rear armour drops from 6 armour planes and a complex hinging system to a single flat plate.
2: The stowage boxes and mudguards merge into a single piece integral to the hull.
Please let me know of any inaccuracies in my guide, I am not an expert and am always hunting for more information. Much of my data has come from websites such as WWII Vehicles.com.
~Bob
From left to right; ausf A, ausf B, ausf C, ausf D.
The ausf A and ausf B are both converted from Zvezda's ausf A model (the box inaccurately calls it an ausf B), the hideous Zvezda machine guns being replaced with spares from the PSC sets. The ausf C and D are both straight out of the box PSC models. All are depicted in post 1942 style camouflage to make it easier to discern the differences between the models. The two earliest models had been out of production for some time before this camouflage was adopted.
Sd.kfz 251/1 ausf. A
The first variant of the 251. Prototyping for an 3 ton unarmoured halftrack had started in 1934, with the concept of using the same chassis as an armoured carrier added to the requirements a year later. It wasn't until June 1939, only two months before the Invasion of Poland, that they were first issued to units. This variant was only produced in small numbers and was discontinued in 1940.
Sd.kfz 251/1 ausf. B
The second variant of the 251. Little has changed from the first version, only minor evolutionary upgrades resulting from early feedback. The variant began production in 1939, only shortly after the ausf A, and was likewise discontinued in 1940.
Changes from ausf. a to ausf. b
1: The ausf B introduced a shield for the machine gunner, replacing the more flexible mounting. Many ausf A vehicles were upgraded to the ausf B's new mounting system.
2: The more important change was the removal of vision slots from the passenger compartments and the repositioning of vehicle tool sets to the mudguards.
Sd.kfz 251/1 ausf. C
The third variant shows the first structural modifications aimed at reducing production costs, and was also the first to see large scale production. It came into service in mid 1940 after the conquest of France, and continued in production until September 1943.
Changes from ausf. b to ausf. c
1: The first major noticed is the simplification of the front armour from two plate to a single plate
2: The cooling flaps were replaced with vent covers which allowed for better engine cooling
3: Another minor change was the repositioning of the storage lockers further to the rear.
Sd.kfz 251/1 ausf. D
The final variant began leaving factories in 1943 and was the simplest to build and most produced. The total production of all earlier ausf.s combined was a bare 4,650 vehicles, compared to 10,602 ausf D's. While production technically ended with the fall of Germany, the Praga and Tatra factories of Czechoslovakia continued production of the vehicle until 1963. These were designated as the OT-810 and may have be retrofitted by WWII re-enactment groups .
Changes from ausf. c to ausf. d
1: A follow from the simplification of the front plate seen in the change between the ausf B and ausf C. The rear armour drops from 6 armour planes and a complex hinging system to a single flat plate.
2: The stowage boxes and mudguards merge into a single piece integral to the hull.
Please let me know of any inaccuracies in my guide, I am not an expert and am always hunting for more information. Much of my data has come from websites such as WWII Vehicles.com.
~Bob
Thursday, 4 July 2013
Perry Miniatures - Desert Rats (Part 1)
The Perry Brothers first foray into WWII plastics, it has been a long time since the metal WWII models they sculpted for Wargames Foundry, and several years since their first plastic kits.
This set provides a "Platoon in a box", the instruction leaflet even shows the platoon organisation of the period that this box can achieve:
Three 10 man sections with one Bren gun and one Thompson SMG each,
One 2" light mortar team
One Boys anti-tank rifle team
And a command section with lieutenant, radio operator and platoon sergeant
There is even one spare man to add where you like.
The Afrika Korps box (hopefully out later this year) will have a variety of hats, but in the British case the separate heads mainly allow better moulding techniques.
There are also 2 SMGs and lots of rifles on each sprue, plus a bucket load of picks, shovels and bayonets to add to the models.
The command sprue has the radio operator and officer, with an option of SMG, pistol or rifle. The officer has a choice of helmet or cap, finally making use of the separate head system.
20mm round bases for the infantry (left), which are rather small compared with the bolt action standard 25mm (right). Being thinner than warlord's semi heroic faire the Perry models look better on the small bases, but the difference still niggles me.
The weapon team bases annoy me even more.
40mm square bases!?! I hate mixing square and round bases in a game, it feels wrong. So I made my own 50mm round bases with a 20mm cut out so the loader can come off for casualty purposes.
But at least the scale doesn't seem too far off.
I will do a proper review with scale comparisons once I have finished painting them.
~Bob
This set provides a "Platoon in a box", the instruction leaflet even shows the platoon organisation of the period that this box can achieve:
Three 10 man sections with one Bren gun and one Thompson SMG each,
One 2" light mortar team
One Boys anti-tank rifle team
And a command section with lieutenant, radio operator and platoon sergeant
There is even one spare man to add where you like.
Infantry sprue (Front)
There are three identical infantry sprues each with 12 men; 7 standing, 3 kneeling, and 2 prone as a weapons team. Helmets are seperate from the heads to reduce undercuts, but there are no alternative hats accept the LRDG/SAS heads which require you to remove the head from the body.
The Afrika Korps box (hopefully out later this year) will have a variety of hats, but in the British case the separate heads mainly allow better moulding techniques.
Infantry sprue (Back)
Each of the three infantry sprues come with a 2" mortar, a boys anti tank rifle and 2 bren guns with the minor issue that nearly all are designed to fit on one of the prone bodies with the other prone man serving as loader.
There are also 2 SMGs and lots of rifles on each sprue, plus a bucket load of picks, shovels and bayonets to add to the models.
Command Sprue
The command sprue has the radio operator and officer, with an option of SMG, pistol or rifle. The officer has a choice of helmet or cap, finally making use of the separate head system.
Bases
The bases were a bit of an odd choice for the Perry brothers.
20mm round bases for the infantry (left), which are rather small compared with the bolt action standard 25mm (right). Being thinner than warlord's semi heroic faire the Perry models look better on the small bases, but the difference still niggles me.
The weapon team bases annoy me even more.
40mm square bases!?! I hate mixing square and round bases in a game, it feels wrong. So I made my own 50mm round bases with a 20mm cut out so the loader can come off for casualty purposes.
Armour Support
I even Picked up a Tamiya Matilda to go with the army, though looking at warlords rules for it I'm rather sceptical as to it's utility.
But at least the scale doesn't seem too far off.
I will do a proper review with scale comparisons once I have finished painting them.
~Bob
Subscribe to:
Posts (Atom)